
Workflowy
When working with local installation, tools like our Workflowy Parser may be helpful for creating indices and adding text on Sefaria.
What is Sefaria's Workflowy Parser?
This tool is designed to integrate Workflowy capabilities so developers can create complex texts in Sefaria with ease. Sefaria's content team has used Workflowy to create Index objects for over 300 books in the Sefaria Library, including resources such as Mesilat Yesharim, Horeb, Shulchan Arukh HaRav, Guide for the Perplexed, and From Sinai to Ethiopia, among others. This is an important tooling option for Index creation that usually doesn't require any engineering skills.
What is Workflowy?
Workflowy is a versatile web-based tool for organizing information through nested lists, offering features such as tagging, collaboration, and offline access. Workflowy allows users to build nested lists that can be exported to an .opml file. Once exported, the lists can be parsed and ingested as an Index or Version in the Sefaria Library.
How can we use Workflowy to add texts to the Sefaria Library?
As mentioned above, we can use Workflowy to create a table of contents for a text (an Index record), and even to fill in simple text for that Index (a Version).
This involves two main steps:
- Creating a Workflowy document representing the text
- Uploading the
.opmlfile on your local instance of Sefaria
Part 1: Preparing the Workflowy Document:
Workflowy stores nodes as an outline. The parsing script (mentioned above) will use this form to create a layered table of contents.
In order to begin, you'll need to create a new Workflowy document.
Please note: To use Workflowy, you'll need to register for and log in to a free account.
Once logged in to your Workflowy account, use their interface to create a new document, then define the following criteria.
1) Book Structure Definition
In order to use Workflowy to define a book structure:
-
Add a single bullet to the main page containing the title of the book being described. All other bullets describing the internal structure of the text must be nested under this initial bullet.
-
Separate the English title from the Hebrew title by using the forward slash
/character on the keyboard. Titles in both languages are required. -
If you wish to add alternate English or Hebrew titles, please group each language together (i.e., do not write one English title, then one Hebrew title, and then another English title), separated by the
/character. Alternate titles should be separated into their respective language catgories using the pipe|character, usually found above the enter key (on a PC) or the return key (on a Mac).The result should look like: English Title 1|English Title 2 / Hebrew Title 1|Hebrew Title 2
-
Proceed to add nested bullets as needed to describe the text structure. The same rules of adding titles apply to each of the nested bullets.
For example:
- Siddur A / סידור א
- Shacharit / תפילת שחרית
- Minchah / תפילת מנחה
- Maariv|Arvit / מעריב|ערבית
- Vehu Rachum / והוא רחום
- Shacharit / תפילת שחרית
2) Segment Depth Specification
The deepest bullet at any point will be the one where text is actually stored. By default, this means that you can only create a series of paragraphs at a single level of depth at this point. For example: A bullet titled "The Tale of the Four Kings" will only be able to have references such as The Tale of the Four Kings.1, The Tale of the Four Kings.2, etc., unless otherwise specified.
Therefore, if you want a certain bullet title to use numeric continuation at a depth larger than one (such as Chapter and Verse), you must specify this in square brackets [] after the titles.
For example:
When using only a number to denote depth, indicate it like this:
- Midrash on Kings
- Introduction
- The Tale of the Four Kings [2]
When using section names and implying depth from the number of section names, indicate it like this:
- Midrash on Kings
- Introduction
- The Tale of the Four Kings ['Chapter', 'Verse']
When using both section names and types, indicate them like this:
- Midrash on Kings
- Introduction
- The Tale of the Four Kings ["Chapter:Integer", "Verse:Integer"]
3) Default Titles
Sometimes you will find yourself with a structure like this:
- The Tale of the Four Kings
- Introduction
- The Tale of the Four Kings
In such a case, we use a notion called a default node in order to eliminate the title repetition. To accomplish this, simply replace the redundant title with the special string \*\*default\*\*:
For example:
When creating an Index Outline with a default string, indicate it like this:
- The Tale of the Four Kings
- Introduction
\*\*default\*\*
4) Specifying Categories
If you wish to specify text categories that align with those found in the Sefaria Library (e.g., Talmud --> Bavli --> Seder Zeraim), please add them to the root bullet after the title. Surround the text category with the percent sign( %). The categories themselves should be separated with a comma (e.g., Talmud,Bavli,Seder Zeraim).
For example:
When creating an Index Outline that includes text categories, indicate them like this:
- Modern Commentary on Esther / פירוש מודרני על מגילת אסתר %Tanakh,Commentary,Modern Commentary%
- Introduction / הקדמה
- Part One / חלק א׳
- Part Two / חלק ב׳
\*\*default\*\*
- Introduction / הקדמה
Important Notes
Delimiters and Forbidden Characters
The following characters are used as delimiters, and therefore may not be used inside of any title:
/- The forward slash|- The pipe character
Additionally, do not use a hyphen (i.e., -) as part of a title. Titles are used to craft URLs to Sefaria, and a hyphen is an illegal character inside a URL.
Commenting
If you need to make a comment that should not be parsed, surround the comment by the pound sign # , so it will be ignored.
For example:
- Modern Commentary on Esther / פירוש מודרני על מגילת אסתר %Tanakh,Commentary,Modern Commentary%
- Introduction / הקדמה
- Part One / חלק א׳ # Remember to get the text for this!
- Part Two / חלק ב׳ # I have the text in a .docx file, must convert!
\*\*default\*\*
- Introduction / הקדמה
5) Optional: Adding version text to the Workflowy outline
In some cases, it might be preferable to enter the version text into the Workflowy rather than later, through the Sefaria GUI. In this case, text can be added to outline nodes using the Workflowy "add note" feature. In order to use this feature, hover the cursor over the appropriate bullet and select "add note".
Please note: Only text of depth 1 can be added in this way. Any higher depth will not be possible (e.g., you can add a list of verses, but not a list of chapters with verses inside them).
Parsing Text Formatting
This script uses the following standards when parsing:
- Text inside parenthesis
()is italicized (<em>). - A paragraph break [i.e., the enter or return key] separates paragraphs.
- Forward slashes
/are interpreted as line breaks. - If you need to list version attributes (e.g., versionTitle, versionSource, etc.), use the notes on the primary text title (the topmost title that refers to the whole book), as that will usually not have other text under it.
6) Exporting the Workflowy:
To export, simply hover the cursor over the bullet of a root node in the Workflowy document. Select "export" and choose opml. Save to .opml file.
For example:
An .opml file may look like this:
<?xml version="1.0"?>
<opml version="2.0">
<head>
<ownerEmail>
[email protected]
</ownerEmail>
</head>
<body>
<outline text="Text" _note="Version is ABCDE ">
<outline text="My Text | Textual Text / הטקסט שלי %Tanakh,Modern Commentary%">
<outline text="Chapter 1 / פרק א׳" _note="The first verse,The second verse,The third verse " />
<outline text="Chapter 2 / פרק ב׳" />
</outline>
</outline>
</body>
</opml>Part 2: Uploading the Index via Moderator Tools
To upload the text to Sefaria, make sure your local installation of the project is running.
To do so, log in to your local user account and make sure you have admin permissions set.
Once logged in, navigate to /modtools. On most machines this will be found at http://127.0.0.1:8000/modtools. Then, scroll down to the Workflowy Outline Upload section, pictured below:
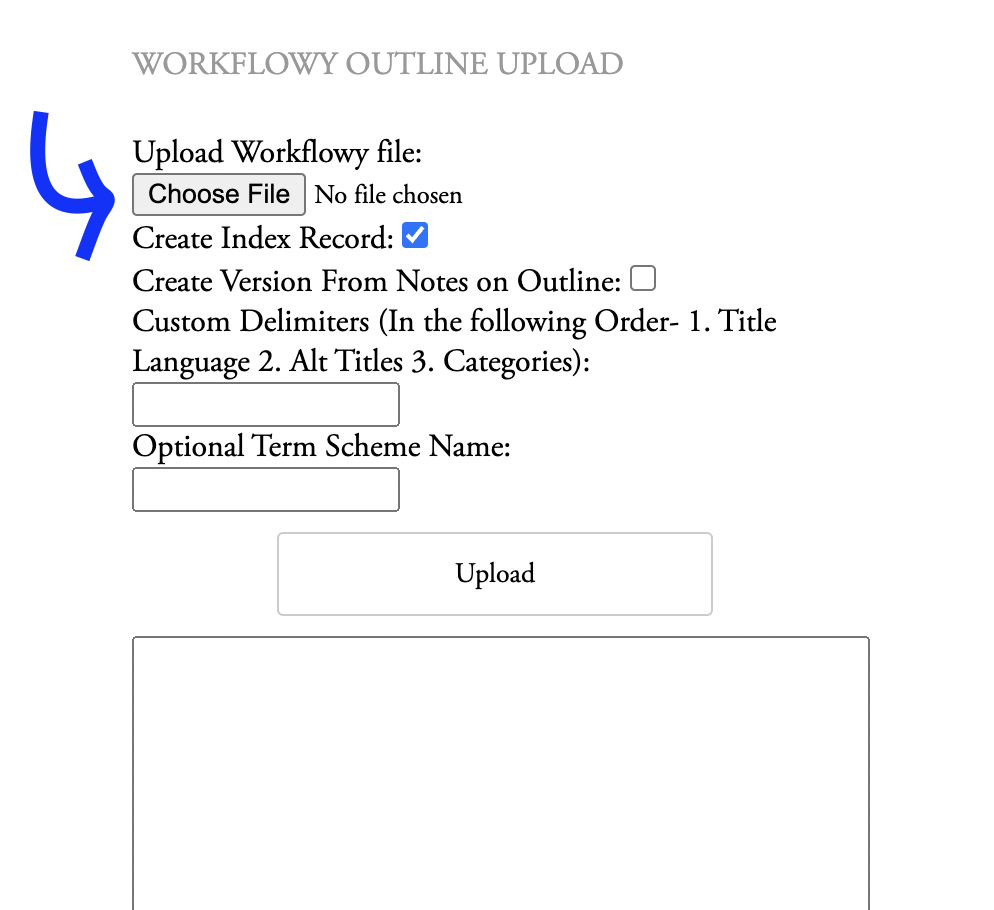
Click on choose file and select the .opml file downloaded from Workflowy. Select whether you are only creating an Index or both creating an Index and also adding a Version of the text.
Once you've completed selection, click upload to upload your text to your local Sefaria database.
Upon success, you will see the full Index record for the newly created text in the text box beneath the upload button, like this:
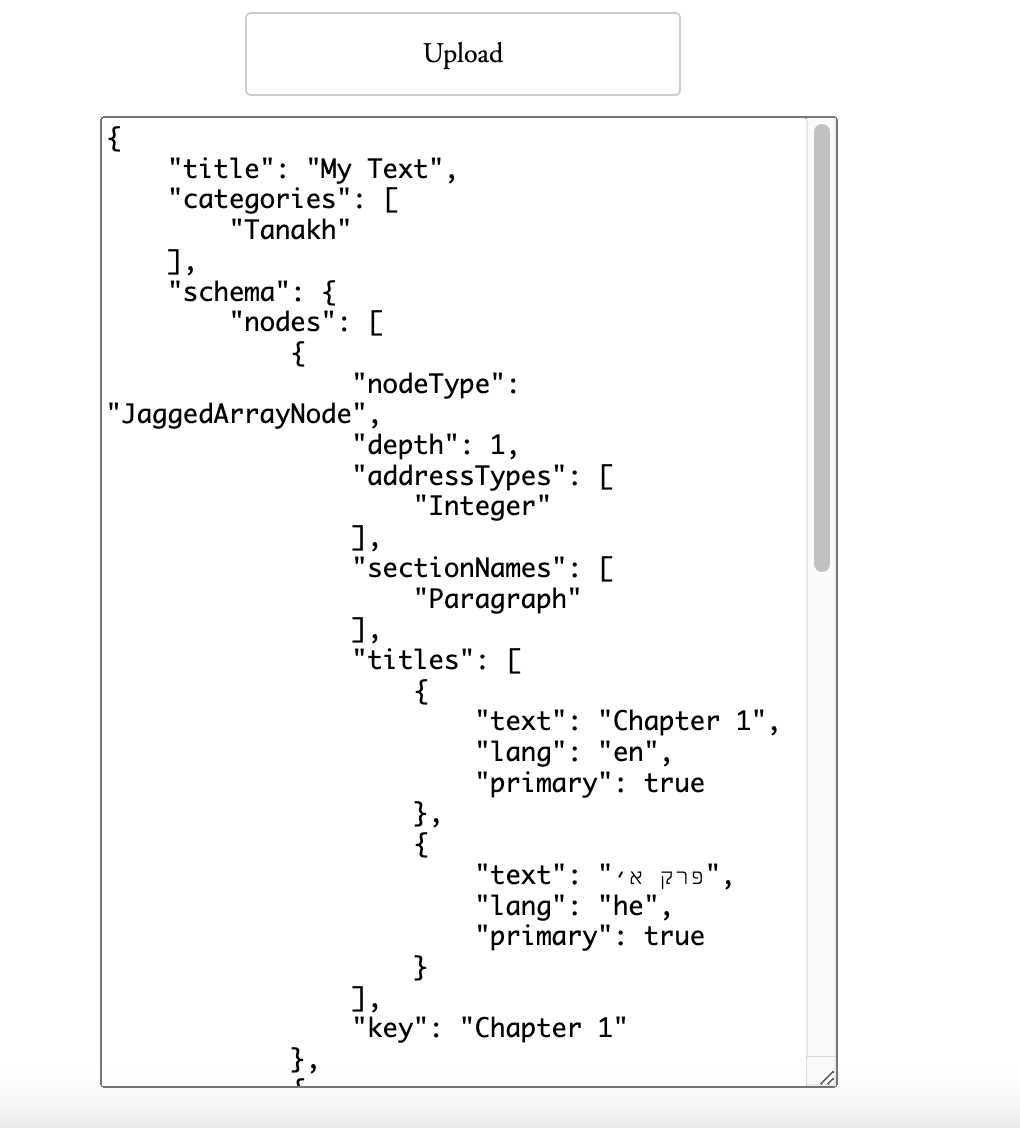
Please note: To see this in the code, navigate to Sefaria-Project/sefaria/views.py and look at the modtools_upload_workflowy() function.
Updated 11 days ago